Page 1 of 1
NOx Shield Introduction.
Posted: 29 Jan 2021 12:57
by Christian_Bylund

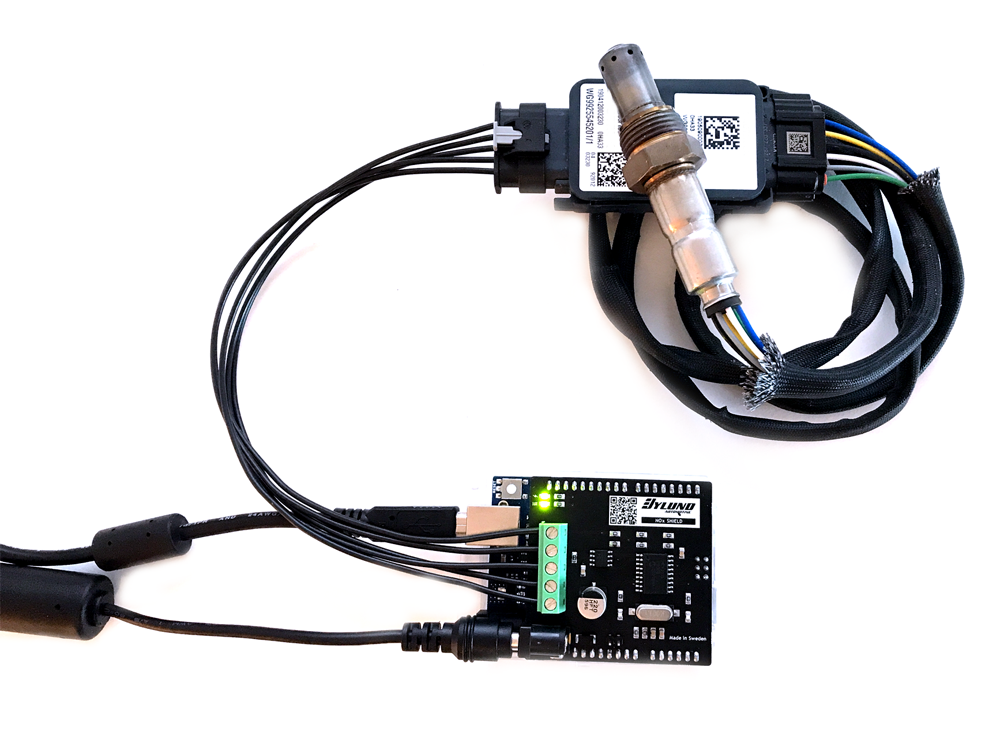
We are happy to present the NOx Shield, designed specifically for the Arduino® Uno, Mega 2560 and Uno WiFi Rev 2.
The purpose of this device is to give students, hobbyists and professionals the possibility to learn how to implement a high-resolution wideband oxygen and nitrogen oxides (O2 NOx) sensor in their products or projects. Adding accurate data, such as the content of nitrogen oxides in a closed loop control environment will assist in developing more efficient and environmentally friendly combustion-based solutions. Watch the introduction video on
YouTube.
Re: NOx Shield Introduction.
Posted: 09 Feb 2021 10:30
by DonP
Hi Christian,
Out of curiosity: could you briefly explain what the main use cases for this sensor would be? Is it diesel engines?
Many thanks!
BR,
Pascal
Re: NOx Shield Introduction.
Posted: 13 Feb 2021 10:00
by Christian_Bylund
DonP wrote: ↑09 Feb 2021 10:30
Out of curiosity: could you briefly explain what the main use cases for this sensor would be? Is it diesel engines?
Hello Pascal, great question!

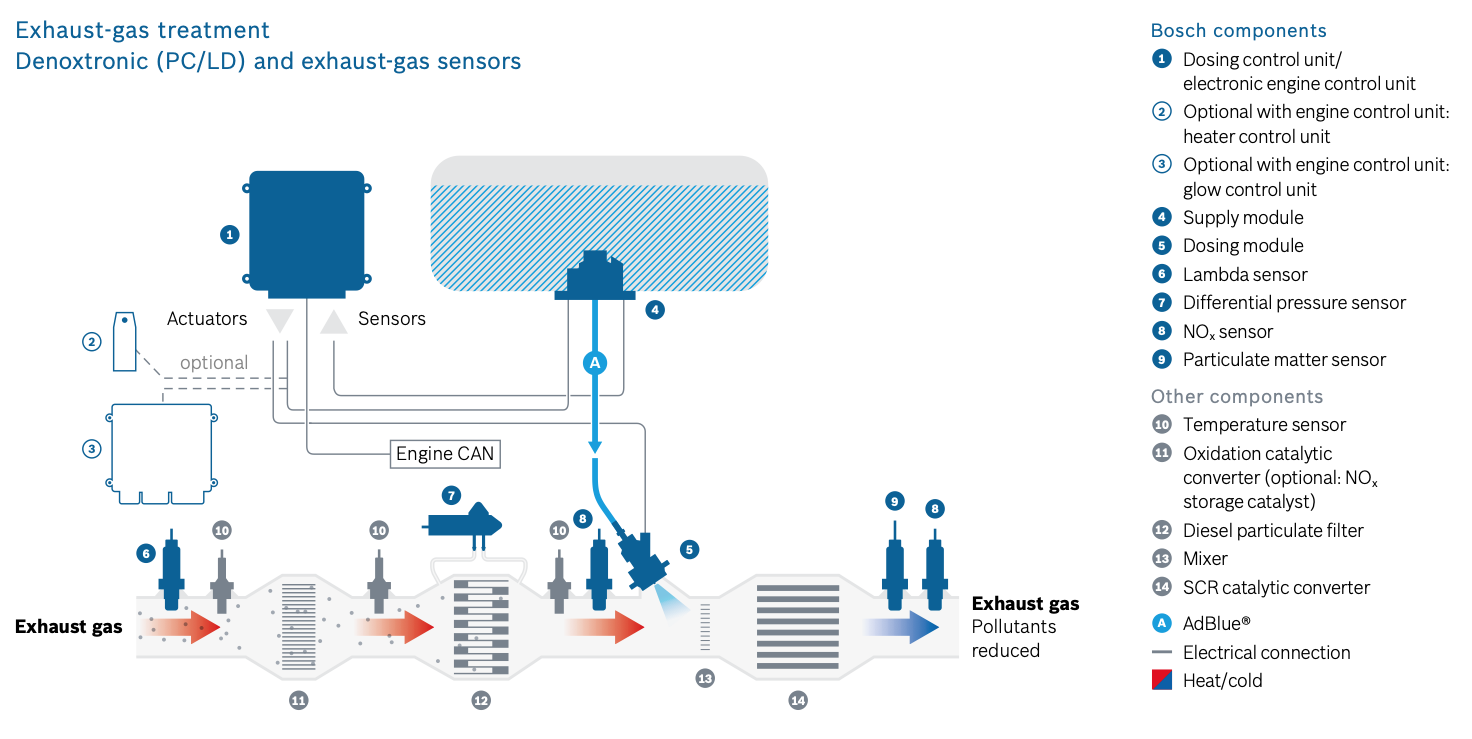
In the automotive diesel world as you can see in the example of Bosch Denoxtronic, it is used to measure the
NOx level before the
SCR catalytic converter to adjust
AdBlue. It is then again measuring the result to verify that the process meet regulatory requirements. In this case the NOx Shield for Arduino can be used in workshops to diagnose sensors and emission controls.
Another area where I hope the NOx Shield will also be useful, is the process of burning solid fuels or
biomass. For example to generate heat or electricity in rural areas.
A typical home heating system generate around 100 ppm of NOx. As the NOx sensor is also a wideband oxygen sensor it perfectly suited as one of the factors of NOx levels is the amount of oxygen.
The final area is in the field of research and development, Arduino is a great ecosystem for this purpose. I hope that with this device, students, engineers and scientists can work on solid fuel combustion without spending valuable research budgets on expensive equipment. There is a
great need of solid fuels and hopefully we can find ways to produce them more environmentally friendly at a low cost using automotive sensor technologies.
Thank you, and I am looking forward to see the results of using the NOx Shield for Arduino.
Re: NOx Shield Power Supply.
Posted: 13 Mar 2024 02:11
by tonyrobinson
Hello Christian
I am new to using Nox Shield with Arduino board. I have an Arduino UNO R3 Set board. I have watched your instruction video many times I can see how you connect the wires from the Nox Sensor to the Nox Shield board, I am using a Bosch EGS-NX Sensor 24V but will be using it on cars. The problem I have is during the video you connect the USB connection to the Arduino Board and then the barrel power supply to the Nox shield Board. I need to know what power supply you are connecting to the Nox shield board, voltage and is it Positive centre pin and what size is the pin ?.
Regards
Tony Robinson
Re: NOx Shield Power Supply.
Posted: 12 Apr 2024 21:16
by Christian_Bylund
tonyrobinson wrote: ↑13 Mar 2024 02:11
Hello Christian
I am new to using Nox Shield with Arduino board. I have an Arduino UNO R3 Set board. I have watched your instruction video many times I can see how you connect the wires from the Nox Sensor to the Nox Shield board, I am using a Bosch EGS-NX Sensor 24V but will be using it on cars. The problem I have is during the video you connect the USB connection to the Arduino Board and then the barrel power supply to the Nox shield Board. I need to know what power supply you are connecting to the Nox shield board, voltage and is it Positive centre pin and what size is the pin ?.
Regards
Tony Robinson
Hello Tony, you find this information in the
technical manual.
-
Posted: 27 Nov 2024 15:45
by LeoFreskos
ok, 24v is a whole different ball - or hockey.
For a 2 wire 24v supply the negative goes to pin 1 and the positive goes to pin 4.
Set the switch inside the power supply to 24v.
You can only use the dynamotor position, the vibrator is disabled.

